
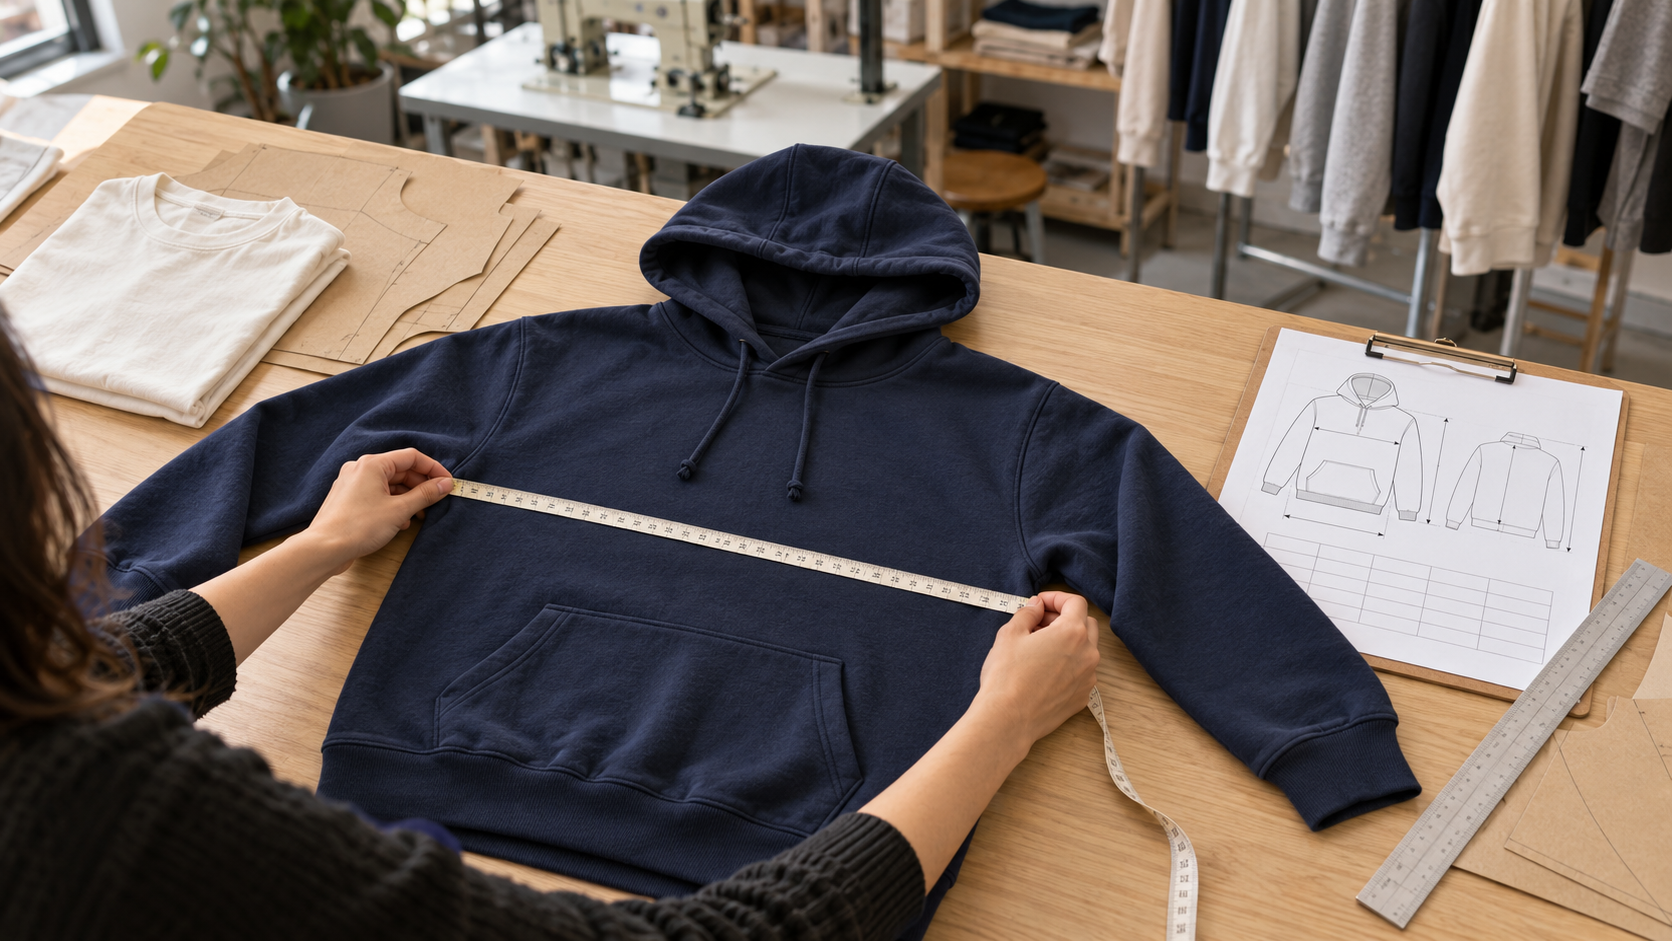
You approve a medium hoodie sample, then order small through extra-large. When the shipment arrives, the chest widths look reasonable, but the sleeves and body lengths do not match the fit you expected.
A clear clothing size chart helps turn a design idea into measurements your manufacturer can follow. For US apparel brands ordering custom T-shirts, hoodies, or tracksuits, that means defining the fit before bulk production and checking it across the size range.
To create a clothing size chart, define your target customer and fit, separate body measurements from garment measurements, specify how each dimension is measured, and develop measurements for every size. Agree on tolerances, review physical samples, and publish customer sizing guidance that matches the approved product.
Body size chart vs garment measurement chart: what is the difference?
A body size chart describes the person a size is intended to fit. A garment measurement chart describes the clothing itself. The numbers serve different purposes and should be labeled clearly.
| Document | What it tells the reader |
|---|---|
| Body size chart | The intended wearer’s body measurements, such as chest or waist circumference. |
| Garment measurement chart | The finished garment’s dimensions, such as flat chest width and body length. |
| Factory specification sheet | Detailed production targets, measurement methods, tolerances, and revision information for the style. |
For example, a hoodie measuring 23 inches across the chest when laid flat is not designed for a person with a 23-inch chest circumference. Doubling that width gives approximately 46 inches around the garment at that measurement line. The wearer’s body measurement and the intended room inside the garment are separate considerations.
Shopify’s sizing guide also distinguishes body measurements from garment dimensions. Use explicit labels instead of a column simply called “chest.”
1. Define the customer and fit before choosing numbers
“US sizing” and “oversized fit” are useful starting descriptions, but neither gives a factory enough information to develop your product.
Write a short fit brief covering your intended customer, size range, silhouette, and use. For a hoodie, describe the shoulder position, body length, sleeve shape, and whether it should accommodate another layer.
A useful brief might say: “Adult relaxed pullover hoodie with dropped shoulders, a straight body, and room over a T-shirt.” Pair the description with reference photos and an approved fit sample as development progresses.
If you sell a unisex style, validate the intended fit with representative wearers. The word “unisex” does not explain how the same garment will sit on different body shapes.
2. Choose the measurements your manufacturer needs
A point of measurement, or POM, identifies a specific garment dimension. Give each POM a name and a repeatable method. Add arrows to a garment sketch so the factory and your team measure between the same endpoints.
| Point of measurement | Method to define in the specification |
|---|---|
| Half-chest width | Measure straight across the body while flat, at a clearly marked distance below the armhole. State that distance. |
| Body length | Identify the starting point, such as the high shoulder point beside the neckline, and the endpoint at the hem. State whether rib is included. |
| Shoulder width | Define the shoulder-seam endpoints and whether the tape runs straight across the back. |
| Sleeve length | Specify the route from shoulder seam to sleeve end and whether the cuff is included. |
| Hem or cuff opening | State whether the measurement is flat width or circumference, and whether it is relaxed or stretched. |
Adapt these methods to the design. Raglan sleeves need different reference points from set-in sleeves. A hoodie may also require hood, pocket, armhole, and rib measurements; a jogger needs its own waist, rise, inseam, and leg-opening specifications.
Use a consistent surface and handling method. Do not stretch a relaxed measurement or switch between front and back length without changing the label.
3. Build a base-size specification
Select a development size that suits your target customer and sampling plan. Work with your pattern maker or manufacturer to establish its measurements, then check those measurements against a physical sample.
Techpacker’s garment specification guide explains how measurement information supports communication between a designer and manufacturer. Your chart belongs inside the wider tech pack, alongside construction and fabric details.
Record the unit on every sheet. For a US audience, inches are convenient; centimeters can support factory communication. Use 1 inch = 2.54 centimeters, and keep one master unit so repeated conversions do not introduce conflicting targets.
4. Develop and check the other sizes
Pattern grading creates smaller and larger sizes from a base pattern. Grade rules specify how individual measurements change between sizes. Techpacker’s grading explanation describes this relationship between the base size and the wider range.
Do not add the same amount to every dimension automatically. The chest, sleeve, neck, and garment length have different roles in maintaining fit. Ask your pattern maker to propose appropriate grade rules for the style and intended wearers.
Illustrative example only: The hoodie chart below shows a measurement-sheet format. These are invented development targets, not a universal US size chart, recommended fit, or Revoke Industries’ standard sizing. They require pattern development and fit testing before use.
| Measurement | S | M | L |
|---|---|---|---|
| Half-chest width, flat | 22 | 23 | 24 |
| Body length, including hem rib | 27 | 28 | 29 |
| Shoulder width, across back | 20 | 21 | 22 |
| Sleeve length, including cuff | 24 | 24.5 | 25 |
For reference, the example medium’s 23-inch half-chest converts to 58.42 cm. Its 28-inch body length converts to 71.12 cm. A complete production sheet would add the remaining POMs, diagrams, agreed tolerances, and approval details.
5. Agree on tolerances and wash conditions
A measurement tolerance is the permitted difference above or below a target. Agree on it for each relevant POM; do not assume every dimension should have the same allowance.
Illustrative calculation: If the agreed target is 23 inches and its tolerance is ±0.25 inch, the permitted range is 22.75–23.25 inches. This is an example of the calculation, not a recommended tolerance for all garments.
Keep measurement tolerance separate from wash-related dimensional change. Specify when measurements are taken and agree on washing, drying, and remeasurement conditions.
CottonWorks identifies construction, processing, finishing, and garment care among the factors that affect shrinkage. Do not add an assumed shrinkage percentage to every size without sample evidence.
Record the fabric used for fit approval. If you change its construction, weight, or finish, review the fit again. Our fabric GSM guide explains why weight is only part of fabric selection.
6. Approve fit across the size range
Measure received samples against the current specification and record differences. Then assess the garments on suitable fit models or representative wearers. A flat measurement check and an on-body fit review answer different questions.
For your sample review, use this checklist:
- Confirm the style, size, fabric, and specification revision.
- Record actual measurements alongside targets.
- Check shoulder position, sleeve reach, body length, and movement.
- Review the agreed additional sizes, especially where proportions may need attention.
- Document wash-test results and any requested corrections.
- Approve a named revision and corresponding sample before releasing production.
Techpacker’s fit-sign-off guide describes comparing samples with specification measurements and evaluating fit. For a wider quality review, use our hoodie sample checklist.
What should customers see on your website?
Publish sizing information that reflects the approved product. Identify whether the table contains body dimensions or finished garment measurements, show the units, and explain how to measure.
Add a brief fit description and relevant model measurements when available. Keep the chart easy to read on a phone. Avoid publishing the illustrative chart above as your own product sizing without developing and checking the garment.
What to send your clothing manufacturer
We are developing a for a US clothing brand with a [fit description] silhouette.
Size range: [sizes]
Development size: [base size]
Fabric: [composition, construction, weight, finish]
Measurement unit: [inches or centimeters]
Attachments: [POM chart, measurement sketches, fit references]
Quantity: [breakdown by size and color]
Please review the measurement methods and proposed grading, identify missing specifications, and confirm sampling requirements and achievable tolerances before production approval.
Frequently asked questions
Can I use a standard US clothing size chart?
You can use reference sizing to begin development, but validate it against your target customer, pattern, fabric, and intended fit. A size label alone does not define finished garment measurements.
Should a clothing size chart use inches or centimeters?
Either can work if clearly labeled. For US customers, inches are useful; showing both can help international readers. Keep one master unit and convert consistently.
Is half-chest width the same as chest circumference?
No. Half-chest width is measured across a flat garment. Doubling it gives an approximate garment circumference at that line, not the wearer’s body measurement.
Can one size chart cover T-shirts, hoodies, and jackets?
A body-size reference may support several categories, but each style still needs appropriate garment specifications. Different fits, fabrics, and layering requirements can produce different finished dimensions.
Does approving a medium sample approve every size?
No. A base-size approval does not demonstrate that all other sizes fit as intended. Agree on grading and an appropriate size-sampling plan before bulk production.
Develop your next collection with clearer sizing
Share your design, fit references, size range, and measurement chart with Revoke Industries. Request a review of the specifications and sampling requirements for your project.
Explore our OEM and ODM clothing services or use the hoodie tech pack guide to prepare your brief.
Discuss Your Clothing ProjectSources: Shopify’s sizing guide; Techpacker’s garment specification, pattern grading, and fit-sign-off guides; CottonWorks’ shrinkage guidance, linked in the relevant sections. Consulted October 26, 2026. All sample chart values and tolerance calculations are illustrative, not company specifications.






Add comment